How to Knit the Long-Tail Cast-On
Set up the thumb and index strands, form an even long-tail foundation and estimate a useful tail reserve.
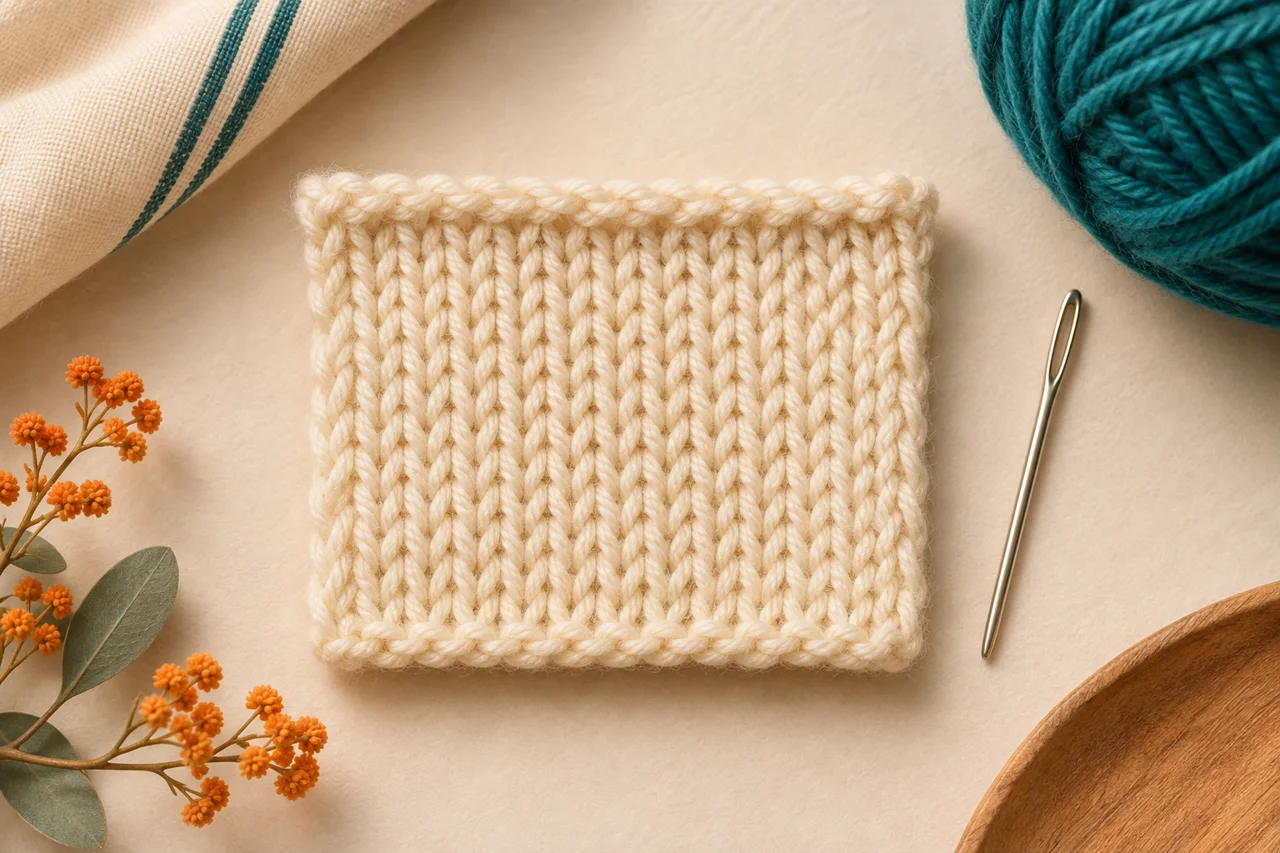
In this guide
The long-tail cast-on forms a foundation from a measured free tail and the working yarn attached to the ball. This lesson uses the right-handed slingshot version, with the tail around the left thumb and ball yarn over the left index finger. The slip knot counts as stitch one in this version.
Choose a manageable practice setup
Use smooth light yarn and a suitable knitting needle, a tape measure and optional markers. You need to recognize a slip knot and distinguish the cut tail from the ball strand; the full knit stitch is the next lesson rather than a prerequisite. Practise ten stitches before casting on for a garment. Use the actual project yarn and needle for a serious tail estimate because strand thickness, diameter and hand tension all affect consumption.
Estimate a tail without pretending it is exact
Cast on a small known number, mark the tail endpoint and unravel the sample to measure the tail used. Scale that measured tail consumption to the intended count, then add a generous finishing and handling reserve. Hypothetically, if ten stitches use 20 cm of free tail, eighty stitches suggest 160 cm plus reserve. This is arithmetic from an invented example, not a measured yarn recommendation. Keep the slip-knot setup allowance in mind when scaling a very small sample; leave extra rather than relying on the last centimeter.
Form the stitches
Place the first loop
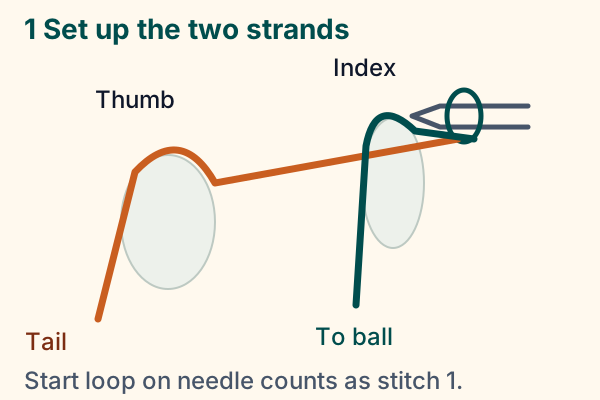
At the estimated tail point, make a slip knot. Put it on the right-hand needle and snug it onto the full shaft so it still slides. Count that loop as one. Hold it near the tip with the right index finger so it cannot fall off during setup.
Separate the two strands
Let the tail hang toward the front and the ball yarn toward the back. Insert your left thumb and index finger between them: tail around the thumb, ball yarn over the index. Hold both lower strands with the remaining left fingers. Open thumb and index to make a slingshot shape.
Go through the thumb loop
Bring the needle tip up from below beneath the outer front strand on the thumb. The needle enters the thumb loop from its base. Keep the thumb open so the loop is visible rather than tugging the strands tightly against the needle.
Catch the index strand
Take the tip over and around the strand on the index finger, catching that ball yarn. Bring the caught strand back through the thumb loop. The yarn from the index becomes the new needle loop; the thumb loop forms its foundation below.
Release and seat
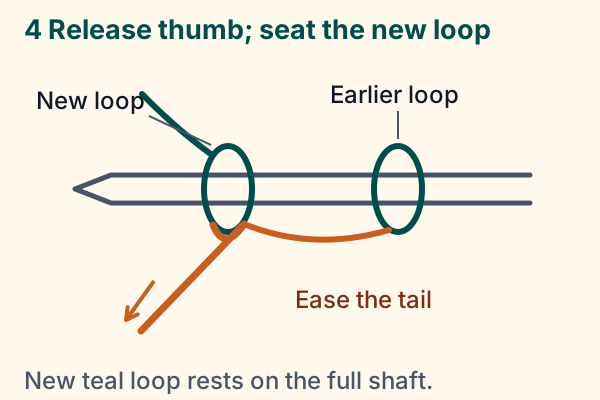
Let the old thumb loop slide off your thumb. Open the thumb into the tail strand again to settle the foundation gently. Seat the new loop on the full needle shaft, leaving it able to slide. Repeat the same route until ten loops, including the slip knot, are on the needle.


Inspect before working the next row
Count loops on the needle without counting the tail below them. Spread the edge gently: it should be even enough to inspect and should not clamp the needle. Make sure the ball strand, rather than the free tail, will be used for the first knit row. For flat practice, put the loaded needle in the left hand and follow the chosen stitch lesson. For a circular project, follow its joining instructions and check the whole foundation for a twist before joining.
Diagnose common cast-on problems
If the tail runs out, stop and undo the cast-on, then lengthen the estimate; an ordinary long-tail cast-on cannot keep consuming a missing tail. If the loops are tight, check that you are seating them on the shaft and easing the thumb strand instead of jerking it. A larger needle may change loop size but cannot guarantee a stretchy foundation. If the edge looks irregular, remake a short section slowly and confirm that every stitch catches the same index strand through the same thumb loop.
Leave the cast-on tail until you can weave it securely. Follow the pattern’s setup-row convention when counting rows; the ordinary convention excludes the cast-on foundation itself from worked-row totals.
Plan with your gauge.
Estimate cast-on stitches and compare project width using your finished swatch.
Explore the planning toolSources & editorial notes
- Purl Soho: Long Tail Cast On — https://www.purlsoho.com/create/long-tail-cast-on/
- Editorial review: primary sources accessed 13 November 2026; original practice examples and simplified schematics. No independent hands-on test or named expert review is claimed.