
Sewing Machine Needles: Sizes, Types and Fabric Tests
A marking such as 80/12 pairs European and American needle sizes.

In this guide
A marking such as 80/12 pairs European and American needle sizes.
| Type | Purpose | Example size |
|---|---|---|
| Universal | General sewing, slightly rounded point | 80/12 for many medium wovens |
| Jersey / ballpoint | Many knitted fabrics | 70/10, 80/12, 90/14 |
| Stretch | Highly elastic materials; special eye/scarf | 75/11 or 90/14 |
| Microtex | Fine sharp point for suitable precision work | 70/10 or 80/12 |
| Jeans / denim | Reinforced construction for heavier wovens | 90/14 or 100/16 |
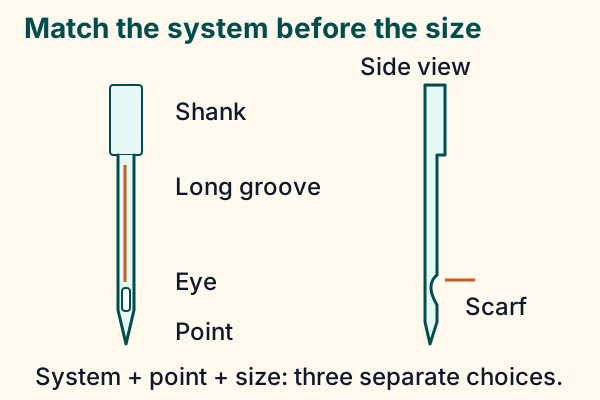
Read three different identifiers
The system specifies the needle’s physical compatibility with the machine. The point/type describes its intended fabric or job. The size describes blade diameter: in the metric system, 75 means nominally 0.75 mm; 75/11 is a common dual label for the same size. SCHMETZ lists 130/705 H for many flat-shank household needles, but that is not a rule for every sewing, overlock or industrial machine. Its color bands are manufacturer-specific information, not a universal color language.
Check the machine manual first
Home sewing, industrial, overlocker and coverstitch needles are not all interchangeable. Verify the system, shank orientation and insertion depth. Switch off as instructed before changing the needle and seat it fully.
Test point, size and thread together
Jersey and stretch needles are different products. A sharp needle is not automatically appropriate for every woven, and one ballpoint does not solve every knit. The eye must accommodate the thread without excessive friction. Use a suitable size that makes a reliable stitch without damaging the material.
Inspect the scrap
- Use project layers, thread, stitch and stabilizer.
- Look at both sides for skipped stitches, holes, loops, runs and puckering.
- Rethread before making large tension changes; change one variable at a time.
- Do not force thick seam crossings under the foot.
| Symptom | Useful first checks |
|---|---|
| Skipped stitches on elastic cloth | Correct system and insertion; fresh stretch-type candidate, thread and stitch trial |
| Large holes or runs | Point/size too aggressive, damaged needle, unsupported knit edge |
| Thread shredding | Eye/thread mismatch, burr or damage, missed threading guide |
| Needle deflects at a bulky join | Stop; thickness/foot clearance, needle system and appropriate construction method |
A repeatable change-and-test sequence
Raise the needle as the manual directs, switch off, secure the needle while loosening the clamp and remove it carefully. Insert the compatible replacement fully in the specified orientation and tighten as instructed. Verify the foot and stitch allow needle clearance before using power. Sew the actual number of project layers and examine both faces, then gently stretch the sample if the garment needs movement. Keep the best sample with its needle, thread and stitch notes. One successful seam does not prove that the same settings will handle every fabric in the type table.
Replacement is condition-based
Replace a bent, damaged or dull needle promptly, and investigate after a needle strike or unexplained thread shredding. An eight-hour reminder is a maintenance prompt, not a guarantee of remaining service life. Wear depends on the fabric, thread and work. Dispose of needles safely.
Make room for the seam.
Calculate cut dimensions from finished dimensions and the seam allowances you choose.
Explore the planning toolSources & editorial notes
- SCHMETZ — Needle Guide — https://www.schmetzneedles.com/pages/needle-guide
- Sources checked 13 November 2026. Original arithmetic and schematic teaching diagrams; hypothetical samples are identified. No independent hands-on craft testing, product performance testing or named expert review is claimed.
